
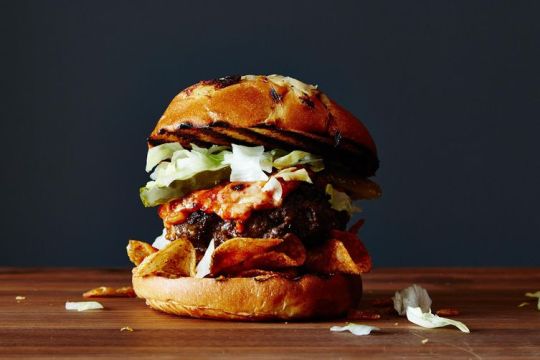
10 Steps to Becoming a Burger Expert
By Leslie Stephens
Our definitive guide to burgers–for now, and to carry you well through tailgating season.
More: 5 tricks to making a mind-blowing burger
Burgers are easy: Just buy a patty at the store, grill it, and serve. But great burgers–those juicy, you-still-remember-them-from-the-summer-of-’09 burgers–require some more expertise. Enter Jamie Schweid of Schweid and Sons, a New York-based ground beef purveyor that’s been around for hundreds of years (since the Meatpacking District had meat packers).
More: Think you know burgers? Take this quiz to find out
When I met Jamie over a burger (what else?) at Genuine in Gotham West Market, he spoke about burgers the same way many do wine–with a fascination and passion that left me considering the nuances of, well, ground meat. Here are 10 steps to understanding those nuances and becoming a burger expert–from the store to the grill:
1. Be a smart burger shopper (and speak up).
While an increasing number of butchers are focusing on the quality and ratios of burger blends (see Step 3 for more on this), Jamie says that many supermarkets stock shelves with the same blend ratios they’ve been selling for decades. So if you prefer a particular blend of burger, speak up–some supermarket meat counters will create a custom blend for you if you order ahead–or order your burgers from a butcher that specializes in blends.
More: 11 condiments for burgers
2. Bring on the fat.
In short, fat is what makes burgers so darn flavorful, so an 85/15 blend (85% meat to 15% fat) will create a “very dry and unflavorful eating experience,” according to Jamie. Just going up a few percentage points of fat can make all the difference: Jamie recommends something closer to 80/20 or even 75/25. (For reference, turkey burgers are about 95/5.) Jamie adds that fat is one of the primary ways that the quality of the meat is determined: The USDA determines whether something is “prime beef” by grading the marbling, or the amount of fat, in the meat. The more fat and the younger the meat, the higher the grade. (Jamie’s personal favorite is USDA prime chuck.)
More: Crafting the perfect burger
3. Know your chuck from your brisket (and your short rib from your sirloin, for that matter).
If you’ve ever ordered meat off of a menu, you know that there are several cuts of beef (flank, porterhouse, and ribs, to name a few). In the burger world, Jamie explains, there are only about four cuts worth knowing, each of which can be combined into different blends:
- Short Rib: Meat from the rib area of the cow has an overwhelming and powerful flavor (think of the richness of a veal shank in osso buco). For this reason, it’s often used in a smaller ratio to round out the flavor profiles of other cuts.
More: 6 tips for building a better burger
- Brisket: This cut has a very meaty flavor that comes from its naturally-occuring oleic acid.
- Sirloin: “Having a burger with a high sirloin ratio is like having a steak,” says Jamie. It has a very hearty flavor that’s similar to that of short ribs. He explains that it works well in burgers because of its texture–as opposed to a strip steak, which doesn’t hold well in a burger.
- Chuck: This cut is beefy, but it has a clean taste and isn’t overwhelming. (It also happens to be Jamie’s favorite.)
4. Understand the terms on burger packaging.
We’ve already covered “prime”meat (which is essentially young, high-fat meat), but there are also terms like “choice beef,” “Certified Angus” and “grass-fed.”
- Choice beef is a step below prime meat (as detemined by the fat marbling), and select is the lowest level of beef sold in retail. It’s also the leanest (less of that good fat), but it doesn’t have a lot of flavor. Luckily, you can always tell the difference–all packaged beef is marked with its USDA grade.
- Certified Angus beef isn’t actually a grading, but a branding used by the company of the same name. It uses only angus cattle, but doesn’t necessarily indicate the quality of the meat.
- Grass-fed beef indicates, as the name suggests, cattle that were raised eating only grass rather than grain. It doesn’t have any fat marbling and has a different flavor profile than grain-fed animals–it’s often gamier, leaner, and slightly healthier. But Jamie (who prefers grain-fed beef) says the health benefits are minimal: “We’re talking 10 calories per serving on a 4-ounce patty, but it’s typically hormone-free.”
5. Check the freshness of the meat.
In addition to the quality of the beef, you should always check the expiration date on the meat, and if listed, the day it was ground. Jamie says, “It should have been ground that day.” And when the packaging says an expiration date, follow it.
6. Keep your patties cold and handle them with care.
In preparing your meat for the grill, you should always keep it as cold as possible until you’re just ready to cook the patties–once they get warm, they’re much more likely to fall apart on the grill. As for herbs and marinades? “This is where I have to take a stand. If you have the right meat, there’s no reason to over-season or marinate. The meat should stand for itself.” He recommends sprinkling kosher salt on each side of the burger, which also helps create a charring effect when pan-frying.
7. Don’t over-think the cooking process.
Avoid futzing with the burger once it’s on the grill–the more you touch the meat, the more likely it is to break apart. And never push down on it while it’s cooking, as this just pushes the delicious fats out of the burger. Jamie says, “Flip once and you’re done.”
8. Don’t over-cook it and let it sit.
While Jamie says he isn’t one to tell people how long they should cook their burgers, he warns that the longer you cook it, the drier and less flavorful it will be. (He goes for medium-rare.) He also says to err on the side of caution: “When you take the burger off of the grill, a lot of people don’t realize that it still cooks once it’s removed.” He recommends removing it from the grill when it’s 160° F, and letting it sit for a few minutes before serving.
9. Top it with whatever you want–there’s no wrong answer.
Jamie’s burger of choice is served on a potato or brioche bun with American cheese and barbecue sauce, but he says, “The beauty of the burger is that there are so many toppings and buns that complement the meat.” It’s best to find what works for you–there’s really no right or wrong way to serve it.
10. Do what makes you happy.
Yes, this is cheesy, but it’s good to keep in mind–if you prefer a well-done 85/15 blend, then go for it. Jamie says, “You’re a true burger lover if you eat and enjoy burgers.” It’s that easy. He adds, “You should never be overwhelmed when cooking a burger or feel incapable in anyway–it’s probably the easiest food to make.”
Photo of chuck by Mark Weinberg; all others by James Ransom.
– This feed and its contents are the property of The Huffington Post, and use is subject to our terms. It may be used for personal consumption, but may not be distributed on a website.
About Me

I love food. Unfortunately, I can't cook worth a damn. I've been known to even burn water.
When I watch chefs and good cooks on tv, I'm so envious of their skills. This blog is the closest I get to cooking, other than the microwave ;)
Try not to drool!
John, New Englander turned Cali dude